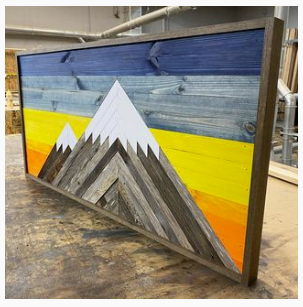
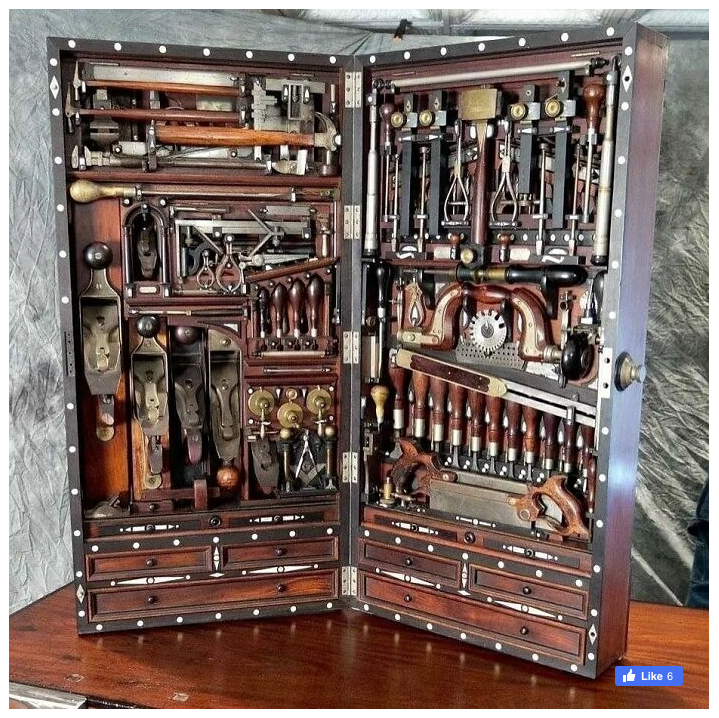
Health Insurance

Implementing Company-Wide Health Insurance: A Comprehensive Guide for Construction Companies in King County, Washington

Offering health insurance is one of the most significant benefits a company can provide to its employees. For a construction company in King County, Washington, implementing a health insurance plan not only improves employee well-being and retention but also offers substantial tax benefits and enhances the company’s reputation. While navigating the process may seem complex, this guide breaks down the steps, local resources, and practical considerations to make implementation smooth and effective.

Why Health Insurance Matters for Your Company

Benefits for the Employer:

  • Tax Incentives: Employers providing health insurance may qualify for federal tax deductions and potential state credits.

  • Competitive Edge: Offering insurance makes your company more attractive to skilled workers, especially in a competitive labor market like King County.

  • Reduced Turnover: Health benefits foster loyalty, reducing costs associated with hiring and training new employees.

  • Increased Productivity: Healthy employees are less likely to miss work, keeping projects on schedule.

  • Enhanced Reputation: Clients and partners value companies that prioritize worker well-being.

Benefits for Employees:

  • Access to essential healthcare services, including preventive care.

  • Financial protection against unexpected medical expenses.

  • Improved morale and job satisfaction.

  • Attraction and retention of skilled workers who value comprehensive benefits.

Health Insurance Options for Small Businesses in Washington

1. Small Business Health Options Program (SHOP)

  • Federally facilitated marketplace offering plans tailored for small businesses with 1-50 employees.

  • Offers potential tax credits if the company pays at least 50% of employee premiums.

  • Website: HealthCare.gov/SHOP

2. Washington Health Benefit Exchange

  • Provides group health plans specifically for Washington-based businesses.

  • Local support through brokers can streamline plan selection.

  • Website: wahealthplanfinder.org

3. Association Health Plans (AHPs)

  • Industry-based plans allow small businesses to band together to secure better rates.

  • Organizations like the Associated General Contractors (AGC) of Washington offer member plans tailored to the construction industry.

  • Website: agcwa.com

4. Private Health Insurance Brokers

  • Local brokers in King County can tailor solutions based on company size and employee needs.

  • Example resources:

    • Alliant Employee Benefits (alliant.com)

    • Vera Whole Health (focuses on preventative and primary care solutions)

Steps to Implement Health Insurance

Step 1: Assess Company Needs

  • Determine the number of eligible employees.

  • Survey staff preferences (e.g., focus on dental, vision, or family coverage).

  • Consider budget constraints and desired contribution levels.

Step 2: Research Plans & Work with a Broker

  • A broker can simplify comparing plans, ensuring compliance with Washington regulations.

  • Consider provider networks, premiums, deductibles, and out-of-pocket maximums.

Step 3: Evaluate Tax Benefits

  • Explore the Small Business Health Care Tax Credit (up to 50% of premium contributions).

  • Health insurance premiums are typically tax-deductible business expenses.

  • Consult with a local accountant for specifics on Washington’s tax laws.

Step 4: Communicate with Employees

  • Clearly explain plan options, costs, and enrollment timelines.

  • Offer educational sessions to answer questions and alleviate concerns.

Step 5: Enroll & Maintain Compliance

  • Complete enrollment through selected providers.

  • Maintain documentation for audits and future reference.

  • Stay updated on annual plan renewals and regulatory changes.

Cost Considerations

  • Average small business employer contribution in Washington: 50-75% of employee premiums.

  • Offering high-deductible plans with Health Savings Accounts (HSAs) can reduce costs while providing tax-advantaged options.

  • Premium costs vary depending on age demographics and coverage options.

Alternative Benefits to Consider

  • Dental & Vision Plans: Often inexpensive and highly valued by employees.

  • Short & Long-Term Disability Insurance: Protects employees unable to work due to injury.

  • Employee Assistance Programs (EAPs): Provides mental health support and counseling.

  • Telehealth Services: Offers affordable, convenient access to medical care.

Local Resources in King County

  • King County Small Business Resource Center: (kingcounty.gov) Provides guidance on local business benefits and compliance.

  • Washington State Department of Labor & Industries: (lni.wa.gov) Information on worker safety and compliance requirements.

  • Seattle Metropolitan Chamber of Commerce: (seattlechamber.com) Connects businesses with local benefit providers.

Why Act Now?

  • Offering health insurance early on positions your company as a leader in worker care.

  • With King County’s competitive construction market, benefits attract top-tier talent.

  • Companies with structured benefits often experience higher productivity, reduced absenteeism, and stronger client relationships.

  • Tax credits and deductions make it financially viable, even for smaller construction firms.

Final Thoughts

Investing in employee health insurance isn’t just about compliance—it’s about building a resilient, dedicated workforce that drives your company’s success. It’s a decision that pays off through improved employee morale, enhanced company reputation, and long-term financial savings.

For a construction company with 8 employees, offering health insurance is absolutely realistic—especially in Washington State, where there are several programs and incentives designed to help small businesses provide coverage.

Key Points to Consider:

1. Small Business Health Options Program (SHOP)

  • Eligibility: Companies with 1–50 full-time equivalent employees are eligible.

  • Benefits: Potential access to the Small Business Health Care Tax Credit, which can cover up to 50% of premium costs if you pay at least 50% of employees' premiums.

  • Realistic Cost: For a small team, premiums (after tax credits) can be manageable, often ranging between $300–$500 per employee per month, depending on coverage levels and provider choices.

2. Association Health Plans (AHPs)

  • Organizations like the Associated General Contractors (AGC) of Washington offer group rates for members, which can significantly lower premiums.

  • AHPs are ideal for small companies wanting to access benefits typically reserved for larger businesses.

3. Direct Benefits of Offering Health Insurance to 8 Employees:

  • Improved retention: Employees are more likely to stay long-term, saving money on hiring and training.

  • Competitive edge: Attracts better talent, especially in construction, where health risks are higher, and benefits are valued.

  • Tax Deductibility: Employer contributions are generally tax-deductible.

  • Healthier Workforce: Fewer sick days and injuries mean fewer project delays.

4. Cost Management Tips:

  • Start with basic health plans and offer the option for employees to buy up to higher tiers.

  • Consider High Deductible Health Plans (HDHPs) with Health Savings Accounts (HSAs)—often more affordable with tax advantages for both employer and employees.

  • Use a local broker to negotiate the best group rates tailored for construction companies.

Bottom Line:

With 8 employees, offering health insurance is feasible and provides long-term financial and operational benefits. The tax credits and group plan options in Washington make it an attainable goal without overburdening the company budget. Even offering a basic plan sends a strong message of investment in employee well-being, which can improve morale, loyalty, and overall productivity.

Would you like help gathering quotes or connecting with local brokers to get exact numbers? I can assist in outlining that process!

Next Steps:

  1. Decide on desired budget and coverage priorities.

  2. Reach out to a recommended broker or association (AGC WA is a strong resource).

  3. Schedule an employee meeting to discuss interest and preferences.

  4. Begin enrollment to secure coverage before the next project cycle.

Safety Protocol

Comprehensive Guide to a Company-Wide Safety Protocol
For Residential Remodeling & Construction Companies

Introduction

A comprehensive Company-Wide Safety Protocol is essential for ensuring the safety, efficiency, and professionalism of any construction business. In the residential remodeling and construction industry, where workers face various on-site risks, having a well-documented safety plan is critical to protect employees, clients, subcontractors, and the company itself. Implementing a robust safety protocol reduces accidents, improves job site productivity, ensures regulatory compliance, and fosters a culture of accountability and care.

Why a Company-Wide Safety Protocol Is Essential

  • Protects Lives: Reduces the risk of injuries and fatalities on job sites.

  • Legal Compliance: Meets OSHA and state regulations to avoid fines and shutdowns.

  • Improves Productivity: Fewer accidents mean less downtime and project delays.

  • Reduces Costs: Minimizes workers’ compensation claims and insurance premiums.

  • Enhances Reputation: Clients and contractors prefer working with companies that prioritize safety.

  • Boosts Employee Morale: Workers feel valued when their well-being is prioritized.

  • Improves Client Confidence: Homeowners and clients appreciate visible safety measures on-site.

  • Standardizes Procedures: Provides clear guidelines, reducing confusion across projects.

  • Increases Accountability: Creates a clear chain of responsibility for safety oversight.

Key Components of a Full-Scale Construction Safety Plan

A complete safety plan should cover all phases of construction, from pre-construction planning to project completion. Below is a breakdown of essential sections and the paperwork required in each.

1. Pre-Construction Planning (Pre-Con Safety Protocols)

Ensuring safety starts long before the first tool is picked up. Pre-construction planning identifies potential hazards, clarifies roles, and sets expectations.

Essential Documents:

  • Job Hazard Analysis (JHA) Forms: Identify potential risks associated with specific tasks.

  • Safety Data Sheets (SDS): For hazardous materials planned for use.

  • Site Safety Plans: Customized plans for each job site outlining known hazards and mitigation strategies.

  • Traffic Control Plans (if applicable): For projects near roads or driveways.

  • Permits and Compliance Certifications: Documenting that all legal requirements are met.

  • Pre-Construction Meeting Agendas and Sign-in Sheets: Ensures all crew members understand the safety expectations.

Example: Before beginning a kitchen remodel in an occupied home, a site-specific safety plan outlines dust control measures, electrical safety precautions, and homeowner safety considerations.

2. Site Safety Protocols

Once on-site, maintaining safety protocols is non-negotiable. Clear communication, routine inspections, and proper signage help mitigate day-to-day risks.

Essential Documents:

  • Daily Safety Checklists: Ensure tools, equipment, and PPE are in working order.

  • Site Safety Inspection Reports: Weekly documented walk-throughs to identify new hazards.

  • Toolbox Talk Logs: Regular short safety meetings covering relevant topics.

  • Visitor Log Sheets: Tracks who is on-site, including clients, inspectors, and subcontractors.

  • Hazard Communication Plans: Procedures for handling and disposing of hazardous materials.

  • Emergency Contact Information Posted On-Site: Easy-to-access details for local medical services and company contacts.

  • Signage and Barricade Documentation: Records placement of warning signs and safety barriers.

Example: For a roofing project, daily checklists ensure harnesses are inspected, ladders are properly secured, and weather conditions are evaluated before starting work.

3. Personal Safety Protocols

Individual worker safety hinges on proper training, PPE usage, and clear behavioral expectations.

Essential Documents:

  • PPE Policy: Detailed guide on required equipment per task (e.g., hard hats, safety glasses, gloves).

  • Personal Safety Acknowledgment Forms: Employees confirm understanding of safety requirements.

  • Fit Testing Records: For respirators or other specialized PPE.

  • Incident Reporting Forms: Documents all injuries, near-misses, and unsafe conditions.

  • Heat Illness Prevention Plan: Especially crucial for summer outdoor work.

  • Substance Abuse Policy Documentation: Clear guidelines prohibiting drugs and alcohol on-site.

Example: Workers performing demolition in a residential basement must wear respirators, gloves, and steel-toed boots, documented through PPE checklists and acknowledgments.

4. Certifications, Training & Protocols

Ensuring that all employees and subcontractors have proper certifications is vital for maintaining high safety standards.

Required Certifications:

  • OSHA 10/30-Hour Certifications: Mandatory for crew leaders and general laborers.

  • First Aid & CPR Certifications: Enables immediate response to injuries.

  • Forklift & Aerial Lift Certifications: Required for operating heavy equipment.

  • Fall Protection Training: For work at heights or on scaffolding.

  • Lead Paint and Asbestos Awareness Training: Especially important for residential remodels in older homes.

  • Confined Space Training: For crawl spaces or attics with limited entry points.

Documentation:

  • Training Logs: Tracks when employees completed safety courses.

  • Certification Copies On File: Easy access for inspectors and clients.

  • Annual Refresher Course Records: Ensures ongoing safety awareness.

Example: OSHA requires documentation of fall protection training for workers installing roofing on a two-story addition. These records prevent fines during site inspections.

5. Emergency Plans & Protocols

Accidents happen—even with the best planning. Quick, effective emergency response can save lives and reduce harm.

Essential Documents:

  • Emergency Action Plan (EAP): Procedures for fire, medical, and severe weather emergencies.

  • Evacuation Maps: Clearly marked routes posted on-site.

  • Medical Emergency Contact Forms: For every employee, easily accessible.

  • Incident Response Logs: Document the immediate response and follow-up actions.

  • First Aid Kit Inspection Records: Ensures supplies are stocked and up-to-date.

  • Emergency Drill Logs: Conducted quarterly to practice response protocols.

Example: During a deck installation, a worker suffers a minor injury. The EAP outlines steps for immediate first aid and hospital transportation if necessary, documented in the incident log.

6. Environmental and Public Safety Considerations

Construction projects often affect not just workers but also clients, neighbors, and the environment.

Essential Documents:

  • Dust Control Plans: Minimizes disruption, especially in occupied homes.

  • Noise Mitigation Plans: Outlines acceptable work hours and noise control measures.

  • Stormwater Pollution Prevention Plans (SWPPP): For compliance with environmental regulations.

  • Client Communication Logs: Keeps homeowners informed of safety-related changes or concerns.

Example: Renovating an occupied home includes a dust containment plan with sealed work areas and HEPA filtration, detailed in pre-job documentation.

Benefits of a Well-Documented Safety Protocol

✅ Reduces on-site injuries and prevents legal claims.
✅ Boosts efficiency by reducing delays caused by accidents.
✅ Improves client trust and satisfaction with visible safety measures.
✅ Reduces insurance premiums through demonstrated risk management.
✅ Creates a positive work environment that attracts skilled workers.
✅ Passes OSHA and local inspections without costly violations.
✅ Enhances overall company reputation and competitiveness.

Conclusion

Investing in a Company-Wide Safety Protocol is not just about compliance—it’s about creating a culture where every worker goes home safely, every client feels secure, and every project runs as smoothly as possible. Comprehensive documentation ensures accountability, consistency, and efficiency, making safety a seamless part of daily operations. Building these systems now means fewer headaches, fewer accidents, and better business down the road.

Next Steps:

  1. Review Current Safety Practices: Identify gaps and prioritize updates.

  2. Develop Missing Documentation: Utilize templates for quick implementation.

  3. Train Staff: Conduct training sessions to ensure company-wide understanding.

  4. Assign a Safety Officer: Establish clear responsibility for ongoing management.

  5. Schedule Regular Reviews: Update protocols annually or after significant incidents.

Prevailing Wage Jobs in WA

Subject: Steps to Help the Company Apply for Prevailing Wage Jobs in Washington State

Hi [Recipient's Name],

Here’s a structured outline detailing how the company can start applying for prevailing wage jobs in Washington State. Public works projects are a valuable source of consistent work, but they require careful compliance with state regulations. This outline provides a step-by-step approach while keeping it concise and actionable.

1. Understand Prevailing Wage Laws in Washington

  • Prevailing wages are set by the Washington State Department of Labor & Industries (L&I).

  • Rates vary by location, trade classification, and project type.

  • These rates are mandatory for public works projects, including schools, government buildings, and infrastructure.

2. Obtain Contractor Registration & License

  • Register with Washington L&I as a licensed contractor.

  • Requirements include:

    • Unified Business Identifier (UBI) number through the WA Department of Revenue.

    • Proof of liability insurance and bonding.

    • Valid worker’s compensation coverage (if you have employees).

3. Get Certified for Public Works Projects

  • Apply for a Public Works Contractor License through L&I.

  • Consider registering on Small Works Rosters, such as MRSC Rosters, to access smaller public projects.

4. Attend Prevailing Wage Training (Recommended)

  • L&I provides workshops covering:

    • Filing required forms (Intent and Affidavit).

    • Understanding certified payroll processes.

    • Overtime and wage classification rules.

  • Training improves compliance and reduces the risk of fines.

5. Register with Federal Systems (For Federally Funded Projects)

  • Sign up on SAM.gov for federally funded prevailing wage jobs.

  • Requirements:

    • Obtain a Unique Entity Identifier (UEI).

    • Ensure company data is up to date.

6. Identify Bidding Opportunities

  • Register on platforms to find and bid on projects:

    • Washington Electronic Business Solution (WEBS) for state projects.

    • MRSC Rosters and local city procurement websites.

    • SAM.gov for federal opportunities.

  • Set up alerts for upcoming bids relevant to your trade.

7. Prepare and Submit Competitive Bids

  • Review project specifications thoroughly.

  • Include:

    • Accurate prevailing wage rates.

    • Comprehensive subcontractor lists (if applicable).

    • Proper documentation (bonds, insurance certificates).

  • Attend mandatory pre-bid meetings to clarify project details.

8. Compliance During the Project

  • File required forms through L&I:

    • Statement of Intent to Pay Prevailing Wages before starting work.

    • Affidavit of Wages Paid upon project completion.

  • Submit weekly certified payrolls detailing:

    • Hours worked.

    • Job classifications.

    • Wages paid.

  • Utilize payroll management software (e.g., LCPtracker, eMars) to streamline submissions.

9. Maintain Compliance and Build a Reputation

  • Regularly monitor prevailing wage rate updates.

  • Conduct internal audits to ensure continued compliance.

  • Maintain open communication with subcontractors regarding compliance requirements.

  • Cultivate positive relationships with general contractors and public agencies to increase future opportunities.

10. Additional Recommendations

  • Join professional associations like AGC WA to gain access to more resources and networking opportunities.

  • Develop a portfolio of completed public works projects to strengthen bid submissions.

  • Stay proactive in attending industry events and training to remain competitive.

///////

1. Deepen Understanding of Prevailing Wage Policies

  • Scope of Work Clarification: Familiarize yourself with the specific scopes of work defined by the Washington State Department of Labor & Industries (L&I). This ensures accurate worker classification and compliance with wage determinations.

    lni.wa.gov

  • Regular Updates: Prevailing wage rates and policies can change. Regularly consult L&I’s official communications to stay informed about the latest updates.

    lni.wa.gov

2. Engage in Continuous Education and Training

  • Workshops and Seminars: Participate in L&I-hosted workshops that cover prevailing wage laws, compliance requirements, and best practices. These sessions provide valuable insights and keep your team updated on regulatory changes.

    seattleschools.org

  • Certifications: Obtaining relevant certifications can enhance your company’s credibility when bidding for public works projects.

3. Network with Industry Stakeholders

  • Professional Associations: Join organizations such as the Associated General Contractors (AGC) of Washington. Membership offers networking opportunities, access to industry resources, and insights into upcoming projects.

  • Public Agency Engagements: Establish relationships with public agencies and attend pre-bid meetings to better understand project requirements and expectations.

4. Implement Robust Compliance Systems

  • Payroll Management: Utilize specialized software to ensure accurate and timely submission of certified payrolls, adhering to prevailing wage requirements.

  • Documentation: Maintain meticulous records of all compliance-related documents, including Statements of Intent to Pay Prevailing Wages and Affidavits of Wages Paid.

5. Explore Diverse Project Opportunities

  • Local Government Projects: Monitor city and county websites for public works projects that fall under prevailing wage laws.

  • School District Initiatives: Many educational institutions undertake construction and renovation projects requiring compliance with prevailing wage statutes.

6. Leverage Technology for Competitive Advantage

  • Bid Management Tools: Adopt platforms that streamline the bidding process, track deadlines, and manage documentation efficiently.

  • Market Analysis Software: Use tools that provide insights into industry trends, helping to identify potential projects and understand competitive landscapes.

7. Prioritize Worker Classification Accuracy

  • Job Descriptions: Ensure that all workers are correctly classified according to L&I’s guidelines to prevent compliance issues and potential penalties.

    lni.wa.gov

  • Apprenticeships: Recognize the distinction between apprentices and journey-level workers, ensuring proper documentation and compensation for each.

    lni.wa.gov

8. Stay Abreast of Legislative Changes

  • Policy Monitoring: Regularly review legislative updates that may impact prevailing wage laws and public works contracting.

  • Advocacy Participation: Engage in industry advocacy efforts to stay informed and influence policies affecting the construction sector.

Citations and Resources:

  • Washington State L&I Prevailing Wage Information

  • WA Contractor Registration Info

  • MRSC Rosters Site

  • WA L&I Prevailing Wage Training

  • SAM.gov Registration

  • WEBS Vendor Portal

  • WA L&I Intent & Affidavit Portal

Gantt Chart

A Gantt chart is a visual project management tool that displays the schedule of tasks or activities over time. It uses horizontal bars to represent the start and end dates of each task, making it easy to see what needs to be done, when it should be completed, and how tasks overlap or depend on each other.

Key Features of a Gantt Chart:

  • Tasks/Activities: Listed vertically on the left side.

  • Timeline: Runs horizontally across the top (days, weeks, or months).

  • Bars: Represent the duration of each task along the timeline.

  • Dependencies: Lines or arrows show the relationship between tasks.

  • Progress Indicators: Shading or colors indicate how much of a task is complete.

Why Use a Gantt Chart in Construction?

  • Visualizes the entire project timeline in one place.

  • Helps manage task dependencies (e.g., framing can’t start until the foundation is done).

  • Improves team communication and accountability.

  • Makes it easier to identify delays and adjust schedules proactively.

  • Provides clients and stakeholders with a clear project overview.

Example in a Bedroom Remodel:

  • Task 1: Demolition (Jan 2 - Jan 4)

  • Task 2: Framing (Jan 5 - Jan 10) Starts after demolition

  • Task 3: Electrical Work (Jan 11 - Jan 13) Depends on framing completion

  • Task 4: Drywall Installation (Jan 14 - Jan 18)

Software tools like Buildertrend, Microsoft Project, and Trello can generate Gantt charts automatically, helping keep projects on schedule.

Would you like a sample Gantt chart for a remodel project? I can create one for you!

Journeyman Program

Proposal: Development of an Internal Journeyman Program

Objective:

To implement a structured employee development program that provides measurable growth opportunities, enhances motivation, and improves retention while offering the company a clear system to track skills and promote deserving team members.

Program Overview:

  • Establish a documented journeyman program with clear benchmarks and goals.

  • Provide structured growth paths for all employees, from entry-level laborers to senior carpenters.

  • Create a living document (spreadsheet or database) to track progress, skills, and certifications.

  • Offer meaningful milestones that correlate with pay increases, leadership opportunities, and job responsibilities.

Benefits:

For Employees:

  • Clear, measurable steps toward advancement.

  • Recognition for their skill development and work ethic.

  • A portable record of achievements valuable for future employment.

  • Increased job satisfaction and motivation through structured goals.

For the Company:

  • Efficient employee evaluations with objective data during reviews.

  • Reduced turnover through enhanced employee engagement.

  • Ability to identify qualified leaders for specific tasks (e.g., stair framing, layout work).

  • Improved mentorship structure by guiding employees through targeted skill development.

Proposed Structure:

  1. Skill Categories:

    • Core Carpentry (Framing, Finish Work, Layout, Stair Building)

    • Tool Proficiency & Ownership

    • Leadership & Team Coordination

    • Safety Protocols & Certifications

  2. Benchmark Levels:

    • Level 1: Basic knowledge & supervised work

    • Level 2: Independent work with quality consistency

    • Level 3: Leadership readiness & job-specific expertise

  3. Tracking Progress:

    • Spreadsheet or digital system where employees log completed tasks.

    • Supervisors (e.g., Eric) verify and sign off on skill demonstrations.

    • Regular review meetings to discuss progress and future goals.

  4. Incentives & Recognition:

    • Pay raises tied to skill milestones.

    • Opportunities to lead projects as skills advance.

    • Company acknowledgment (certificates, recognition events, or bonuses).

Implementation Suggestions:

  • Start with a simple document outlining core skills.

  • Involve team feedback to ensure the program serves everyone’s needs.

  • Gradually expand with new skills and certifications as the program evolves.

Conclusion:

This program is a win-win for both employees and the company. It empowers workers with purpose and growth opportunities while providing management with a clear framework to recognize, develop, and retain talent. I’m happy to help develop the first draft and gather input from the team.

Slab Notes

Professional Project Plan for Sidewalk Slab Pour

Project Overview

Project: Pouring a Concrete Sidewalk
Date: 9/17/24
Location: 27313 264th SE Ave, XXXXXX
Dimensions: 50 ft long, 5 ft wide, winding path
Thickness: 4 inches
Total Area: ~250 sq ft
Total Volume of Concrete: ~3.1 cubic yards (with 10% excess)

Materials and Quantity Estimates

Concrete

  • Ready-Mix Concrete: 3.5 cubic yards (with 10% excess)

  • Strength: 3,000 psi

  • Slump: 4 inches

  • Air Entrainment: 5-7%

Sub-Base Material

  • Crushed Gravel/Stone: ~5 tons (4 inches compacted)

  • Recommended Types:

    • Crushed Stone Aggregate (ASTM No. 57): Good drainage, excellent compaction.

    • Dense Grade Aggregate (DGA): Strong base, fills voids well.

    • Gravel (ASTM No. 67): Clean, washed stone; good for drainage.

Reinforcement (Optional)

  • Fiber Mesh: Integrated into concrete mix

  • Wire Mesh: 6x6 W1.4/W1.4 welded wire mesh

Formwork Materials

  • Form Boards: 2" x 4" lumber (16-ft lengths) for straight sections; flexible hardboard for curves

  • Stakes: ~50 wooden stakes (1" x 2" x 24") and 18-inch metal form pins

  • Form Ties & Braces as needed

Hardware & Expansion Materials

  • Duplex Nails (16d) and deck screws

  • Expansion Joint Strips: Asphalt-impregnated fiberboard (1/2" x 5")

  • Sealant: Flexible polyurethane caulk

Tools & Equipment List

  • Preparation: Tape measures, marking paint, shovels, wheelbarrows, plate compactor

  • Formwork: Hammers, clamps, drills, pry bars

  • Concrete Placement: Rakes, vibrators (optional), screeds, bull floats

  • Finishing: Edgers, groovers, brooms, steel trowels

  • Safety: PPE, first aid kit, warning signage

  • Miscellaneous: Water source, cleaning tools, lighting (if needed)

Step-by-Step Execution Plan

Day Before Pour

  1. Site Preparation (6-8 hours)

    • Mark path, excavate to 8" depth, remove debris.

    • Install & compact 4" sub-base layer.

  2. Formwork Installation (4-6 hours)

    • Set forms, ensure level and proper slope (1/4" per foot).

  3. Reinforcement & Expansion Joints (1-2 hours)

    • Install wire mesh and expansion joints at intersections and every 20 feet.

  4. Final Checks: Verify measurements, forms, and safety setup.

Day of Pour

  1. Pre-Pour (1 hour)

    • Team briefing, safety check, moisten sub-base.

  2. Concrete Placement (2-3 hours)

    • Pour continuously, screed, and bull float surface.

  3. Finishing (3 hours)

    • Edge sides, install control joints every 5 ft, apply broom finish.

  4. Curing: Apply curing compound, set barriers.

Post-Pour (Day 3)

  1. Remove forms (1-2 hours), clean joints, and apply sealant (1 hour).

  2. Site cleanup and tool maintenance (1-2 hours).

  3. Final inspection for compliance and quality (0.5 hour).

Timeline Overview

  • Total Duration: 2-3 days (21-30 hours)

  • Day 1: Site prep, formwork, reinforcement

  • Day 2: Pour, finish, and cure

  • Day 3: Cleanup, sealing, and final inspection

Safety & Compliance

  • PPE: Safety glasses, gloves, vests, hard hats, boots, and hearing protection.

  • Weather: Schedule during dry, moderate weather.

  • Permits: Ensure all local permits and zoning laws are met.

  • Emergency Plan: Accessible first aid and clear communication channels.

Recommendations for Smooth Execution

  • Confirm material deliveries 24 hours in advance.

  • Use checklists for tools and crew assignments.

  • Allow flexibility for unexpected delays.

  • Maintain clear team communication and regular progress checks.

Estimated Completion: 2 to 3 days with a focused and prepared crew.

Use Your Own Tools

The Advantage of Personal Tools in Construction and Maintenance:

The significance of using personal tools within construction and maintenance jobs is paramount. When working in environments such as the Salish Lodge, the impact of the use of personal tools can be profound.

Consider a typical scenario: one is in the midst of an important task, having meticulously planned out the project, only to be halted due to a missing tool, borrowed by a colleague. An unnecessary pause in work momentum arises, leading to a decrease in productivity.

As a professional who has spent decades curating my tool inventory, I can attest to its importance. My tools are not just objects; they are specialized curated extensions of my hands, enhancing my ability to perform my work with precision and skill. They symbolize forethought, passion, and professionalism. Not to mention decades of troubleshooting and trying this or that type.

The practice of using shared company tools, while fostering unity and camaraderie, may often fall short in practice. It can lead to wasted time in searching for tools and gear, dealing with damaged equipment, and even interpersonal conflict over tool availability.

When I operate with my tools, my efficiency is significantly enhanced. As a professional, my objective is to complete tasks with maximum efficiency and minimal disruption. The use of my tools aligns with this objective, eliminating the need for frequent trips to the hardware store and enhancing overall productivity.

The compromise I propose allows the usage of my tools in our work environment. While I understand the principles behind the existing norms, I am confident that this slight adjustment will not only increase productivity but also foster a sense of personal investment in our work.

If this proposal causes any disruption, I am more than willing to revert to the previous protocols. However, I am confident that in my case the benefits will be clear. Operating at full capacity requires the best resources at our disposal. My tools are integral to this capacity, and I firmly believe that their use will yield positive results. 

In the context of our work at the Salish Lodge, we all understand the intrinsic value of our contributions. Although my compensation might be slightly lower than in other establishments, the work experience and the satisfaction derived from maintaining such a magnificent place are incomparable. 

As professionals, personal accountability is key. Tool game is a notable metric when accessing an employee's ability and productivity. Quite simply put, the better equipt for the job, the better the job will go and I can personally prepare for that. While I cannot prepare for other people's tools. While I gather there may have been past issues, I don’t think my choice of tool bag/box usage would affect anyone else. It is at my own risk.

I propose that in my case, we consider this adjustment for the benefit of our team and the Salish Lodge. By using my tools, I can continue to maintain the high standards of our work while maximizing our productivity and efficiency. I am confident that this approach will be advantageous for all of us. 

Thank you for taking this time. 

Bedroom Remodel Project

Bedroom Remodel Project

1. Initial Project Assessment & Pre-Construction Planning

Before any work begins, my priority would be to fully understand the scope, goals, and

expectations of the remodel.

Client Consultation:

◦ Meet with the client to understand their vision, priorities, design preferences, and

functional needs.

◦ Clarify budget constraints, desired materials, timeline expectations, and any

specific features (e.g., closet expansions, built-ins, or lighting upgrades).

◦ Establish preferred communication methods and update frequency.

Site Visit & Assessment:

◦ Conduct a detailed site walkthrough, noting structural elements, electrical and

plumbing locations, and potential obstacles.

◦ Note all safety concerns and develop a specific site safety plan, including

emergency procedures and the nearest hospital/clinic vs ER.

◦ Account for protective measures like floorboard, door protectant, plastic wraps,

dust, framing or rough stages, airflow, etc.

◦ Assess existing conditions to determine necessary demo work, load-bearing walls,

and HVAC considerations.

◦ Document the space with measurements, notes, and photos.

◦ Map with AI Lydar tech.

◦ Enter project info and details into GPT Project Folder to begin AI Collab

◦ Start and maintain a proper database/project folder on my computer for all

documentation and info.

Plan Review or In-House Design:

◦ If working from architect-provided or client plans:

▪ Thoroughly review drawings, verify measurements, and flag

inconsistencies. Gather photos or any info about designs.

◦ If designing in-house:

▪ Develop conceptual sketches based on client input.

▪ Ideally use software like SketchUp or AutoCAD to create 3D models and

floor plans for client approval. (I'm only a beginner with those, but I can

and want to learn)

▪ Utilize AI tools (e.g., MidJourney or RoomGPT) to generate visual

concepts and material palette ideas. (see my sculpture design photos on

my website)

2. Estimating, Scoping, and Budgeting

Material Takeoffs:

◦ Use GPT or construction apps like Handoff software to compile an accurate list of

needed materials.

◦ Confirm quality options based on client preferences and budget.

Labor & Subcontractor Estimates:◦ Scope out required trades (e.g., electricians, plumbers, drywallers, painters,

flooring installers).

◦ Contact trusted subs for quotes, ensuring they understand scope and timeline

expectations.

◦ Plan for contingencies (10-15% buffer for unexpected costs or changes).

Client Proposal & Contract Finalization:

◦ Present a detailed proposal, including a line-item estimate and a project timeline.

◦ Explain terms, payment schedules, and project milestones.

◦ Obtain necessary permits and approvals, with timeframes built into the schedule.

3. Material Sourcing & Logistics Planning

• Source materials early to avoid delays, using reliable vendors for lumber, fixtures,

finishes, and hardware.

• Verify lead times, especially for custom items or specialty materials.

• Schedule deliveries to align with the build sequence, avoiding cluttered workspaces or

storage issues.

• Use Buildertrend/Other Project Management software or calendar system to track

deliveries and maintain a live materials checklist.

4. Detailed Build Plan & Scheduling

Project Schedule Creation:

◦ Develop a Gantt chart using https://ganttchart.ai/ or Buildertrend or Microsoft

Project for transparency and coordination.

◦ Set start dates for demolition, framing, electrical, plumbing, drywall, painting, and

finishing work.

◦ Plan inspections (framing, electrical, plumbing) in coordination with local codes.

Daily Work Plans:

◦ Outline daily and weekly goals.

◦ Present clear paper/digital outlines to employees and subs

◦ Hold brief morning meetings to review progress, address issues, and realign

priorities.

◦ Conduct any safety meetings necessary.

5. Construction Phase

Demolition:

◦ Coordinate debris removal and site cleanliness.

◦ Verify no hidden issues (e.g., mold, faulty wiring) during demo.

Framing & Structural Work:

◦ Ensure walls, headers, and structural elements comply with plans and codes using

existing knowledge and AI databases.

◦ Schedule inspections to avoid delays.

Mechanical, Electrical & Plumbing (MEP):

◦ Coordinate subs to ensure proper installation of wiring, HVAC adjustments, and

plumbing updates.

Insulation, Drywall, and Finish Carpentry:

◦ Ensure quality control at each step.◦ Prioritize safety and site cleanliness.

Flooring, Trim, and Paint:

◦ Finalize material installations with attention to detail and craftsmanship.

6. Client Relations & Ongoing Communication

• Schedule regular check-ins with the client, providing photo updates and Buildertrend

reports.

• Address change orders promptly and ensure the client understands any cost or timeline

impacts.

• Maintain open communication channels with all team members to resolve issues

swiftly.

7. Final Stages & Handover

Punch List Development:

◦ Conduct a pre-walkthrough with the team to identify and fix outstanding issues.

◦ Perform a final walkthrough with the client to address concerns and ensure

satisfaction.

Documentation & Final Review:

◦ Provide the client with care instructions for materials and finishes.

◦ Compile before-and-after photos and documentation into a closing report.

◦ Post before and after shots to website/blog/social media

8. Post-Completion Follow-Up

• Reach out after a few weeks to confirm the client is satisfied and address any lingering

issues.

• Offer maintenance suggestions to preserve the quality of the remodel.

Use of Technology & AI Tools

Buildertrend or Similar: Centralized project management, client communication, payroll

integration, and material tracking.

Polycam: Utilizing LiDAR technology, Polycam enables the rapid creation of accurate 3D

models of interior spaces.

poly.cam

RoomScan Pro

locometric.com

Custom GPT

For reports, client & Sub coms

Ghant AI

Midjourney

Suno

Udio

Day of Framing

Dining room

2 missing 7/8th nuts and tighten down

Corner

SR backing at corner beam

SR backing above door at header

Add missing block

(10’+ spans need blocks)

Add strap at top plate

Add blocks at left corner

Nail sheer pattern in ply outside

Add strap at top plate

Add missing stud.

Tighten new glued HD

Kitchen

Strap sheer wall to double top plate

Fur out studs at sheer panel right

Nail off sheer panel to top plate

Check nailing on sheer wall

Great room

A35 x 3 to beam area

Fix A35 at door opening

Strap large Glulam to LVL

Check for missing hardware for big window rake wall.

A35s

Strap left

Strap right

Tighten corner holddowns

Nail off king stud top

Check plate breaks

Rear portch

Remove braces

Shave off bolts too deep counter sink

Flush facia with 3 blue screws

Entry

5 A35s and 5 H1s at outlookers

Strap wall at beam w no top plate

Shave bolts x8

Sheer beam

Closet

Strap wall to header front

Master bath

7/8th but on hold down

Corner backing

Master bedroom

7/8th but on hold down

Strap header x3 (one extra long one 3-4’)

Strap corner at short wall

Corner backing

Stairs

Fill in 3 knee wall areas

Add toe kickers x2

Block upper area/sheet

Ledger to back

Fur strip wall area

Upstairs

Fur up headers x 3

Fur corner at sheer wall

Add backer at peak

Tool List

Tool List

Econoline Van w rack

Ridgid Job Box

Rolling Tool Bag Bags/Harness/PPE/Weather Gear Fall Safety Gear

Burke Bar

Big 12 and Framing Square

All Basic Hand Tools

Well Organized Hardware Cases / Organized Hardware Bags

Makita Cordless Circular Saw

Makita Cordless Impact/Hammer Drill

Makita 1/2”impact gun

Makita impact 

Makita Cordless Leaf Blower

Makita Cordless Router

Makita Cordless Sawzall

Jobmax Multi-Tool

Angle Grinder

SKILSAW Table Saw 15 Amp 8-1/4” Portable Worm Drive Dewalt

Double Bevel Sliding Chop Saw

2 Bostich Framing Nailers

Bostich Metal Hardware Nailer

Bostich 16 Gauge Brad Nailer

18 Gauge Brad Nailer

21 Gauge Brad Nailer

2-100’ Extension Cords

2-100’ Flexilla Air Hoses

1-50’ Air Hose

Planer

Bosch Roto Hammer / Bits

Pancake Compressor Tank

Klein Laser Level

Laser tape measure

Spud Wrench/Jumbo Sockets

Socket set

All Impact Bits

Drill Bits

Band Saw

Clamps

Kreg Jigs / DIYJigs

Woodshop Misc Gear and Shop Tools Drill Press

Flux Welder n gear

MCCARTHY / MALBERG G.C. - Theme Music

MCCARTHY – MALBERG

(Verse 1)

Building dreams

strong and true

McCarthy – Malberg

we’ll see

through!

Hammer

in hand

we rage

Your vision

plans

built strongly

to STAND

(Chorus)

McCarthy – Malberg G.C.

The glory

and grand

Constructing

the future

the past

and the land!

From foundation

bone

to attics

and stone

MAN

McCarthy – Malberg

The glory

and grand

(Verse 2)

Towers and dragons

bags on

McCarthy – Malberg

crushing

icebergs

from bow

and to stern

Hammer

LAND

wood and MAN

Visions

Tear

strong

Terms

(Chorus)

McCarthy – Malberg G.C.

The glory

and grand

Constructing

the future

the past

and the land!

From foundation

bone and

to attics

stone

MAN

McCarthy – Malberg

The glory

and grand